Showing posts with label paper. Show all posts

12/7/10

Paper Ornament from Holiday Craft Lounge


Last weekend, I went to Holiday Craft Lounge hosted by Anthology. Here is one of the neat things I got - a kit to make my own paper ornament. I don't think this is going to just be a Christmas decoration, but may hang out in this spot for quite a while.

Oh, I also got a package of paper, out of which I got the nice piece of paper on the birthday card in the last post. 

11/16/10

Paper art

Okay, so cutting a couple of rectangles of paper may not really count as art or a craft. But, I want to take some credit for seeing the potential in these sheets of beautiful paper from Blick Art Supply when I was down in Chicago a couple of weeks ago. I don't know if I can take credit for the way the swirls line up so well between the two different frames, though.

As you can see on the left, these frames from Ikea once held pictures, which I sometimes swapped out. I was looking at papers to put in the mat in place of a couple of pictures when I fell in love with the red marbled paper. I found the gold and black just a few moments later in the same drawer, and a plan began to form.


My friend and I made a trip to the outskirts of Chicago for an Ikea trip. As we were leaving, we saw the Blick art supply store. I just had to go. I'd only ever looked at their website. Turns out, they were having a sale on canvases, too, so I also got a couple of those that I'm hoping to turn into some kind of art in the next couple of months.

11/5/10

Craft Night

Paper Source is hosting a Crafter's Night Out in their stores next Thursday. Too bad there isn't one in WI. I'm not sure that I can drive to Chicago for this event, but I wanted to let folks know who might be a little closer to one of my favorite stores. You can pick a store and sign up at their website Paper Source.

While you're in the store, make sure to take a look at all the pretty papers and stock up on supplies for your Christmas cards. I've started to plan mine. Last year, Megs and BLady gave me a Letterpress machine. After some technical and delivery issues, I have it in WI, and I'll be using it to make my Christmas cards. I like the holiday letter press printing plates they have at Paper Source. I'll keep those in mind as I think about what I'm going to do for the cards this year.
40077897

9/29/10

It's a girl

Here is the shower invite I put together for my cousin. Since the event is past, I figured y'all didn't need to see the details.

It is pretty simple, I know. I wanted something that could be printed on colored 8 1/2 x 11" paper, tri-folded and mailed without an envelope.

I'm also going to throw out there that I did this while packing for Las Vegas vacation and in the initial stages of a cold. Not that I don't like this, but if either of these factors would have been taken away, I think I could have done better (sorry, A).

I like the different patterns available in Adobe Illustrator. I would probably go back and pick a different pattern for the A because I don't think you can see it very well.

The party as fun. I actually got to make it because it coincided with another event that had me on an airplane back to Texas. Not that I really need much of an excuse to get down there. I wasn't great company after the event the night before, but I enjoyed seeing family and friends. I'll see y'all all in December, and I promise to be more sociable!

7/20/10

Welcome to the Mt. Horeb art fair. Just one week after Art Fair on the Square, and you'd think that I was art-ed out. No way! Here were more artists with different works. I liked many of the things that I saw - photography, wooden trucks, jewelry, metalwork and more. I bought a few things for me and a few gifts. Here is one of my purchases for myself - a spoon ring. I know someone who has one and I've often admired it and coveted it. Now, I have one for my own! I put it on right away.
I also purchased a work of art for my home. The booth was set up a little from the street, but the bright colors made it stand out. The artist, Gisela Magdalena Moyer, was so nice in describing the feelings that go in to her work. It was inspirational to see the wonderful work and hear how her art has helped her through dark times and still remain able to paint with vibrant colors. One of the first pieces to catch my eye was this piece. Mrs. Moyer describes the meaning and inspiration for the hand art on her website:
These works are very meaningful to me. The hand is one of the oldest symbols for the artist in history. Early man dipped his hand into clay and printed the image on the walls of caves to make this statement: "I was here, I mattered, I had a creative spirit!"
My hands are my tools because they complete what my soul conceives. The Butterfly is my symbol for spiritual lightness. Although this series is whimsical, many of my clients are touched by these works.


She told me that she was inspired by someone telling her that if you touch a butterfly's wings it will die. This work means that you should let go of things. She explained the imagery in the work and what it meant to her. The bee is there for growth, because, she says, anyone who gardens knows that you can't have a garden without bees. The flower and leaves on the fingers are each different, as each of our finger prints are different. The oak leaf represents strength, because the oak leaf is the last to leave the tree. Finally, the flower at the bottom represents inner beauty.

I found the perfect place to hang my paper hand with butterfly - right where the sun first comes in, where I can see it every morning when I wake up in the morning. Go to her website and read her story and see more of her remarkable work. 

So, even though it was hot, I had a very nice time in Mt. Horeb. I even got to meet one of the trolls!

3/25/10

Time for spring wreath

When folks come to visit my apartment, I tell them to go until they see an orange rug. The rug came from Anthropologie many years ago, and I just put it there when I moved in. I always meant to get a new rug, but I've really come to love the spot of color when I come around the corner to my door. Then, at Christmas, I hung my very first wreath. That came down about mid-January and my door has been rather ordinary since then.
Time for spring6


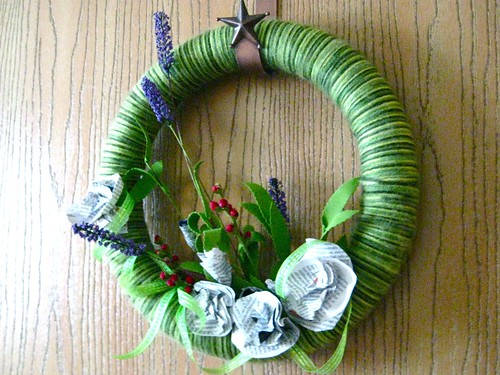
Until now. I finished my new wreath, which I am calling 'Time for spring'. It's made from a Styrofoam wreath form, yarn, fake flowers and pieces of time magazine. And, a lot of hot glue.
Time for spring5 Time for spring1 Time for spring2 Time for spring3 Time for spring4 Time for spring7 
    First, I covered the wreath form with variegated green yarn. This took quite awhile. I started on Sunday during the Oscars, and worked on it a little bit each night since then. The real trick was keeping the yarn from tangling as I wound it around the form.

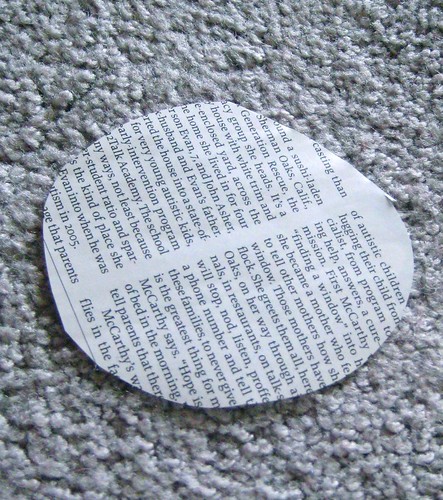
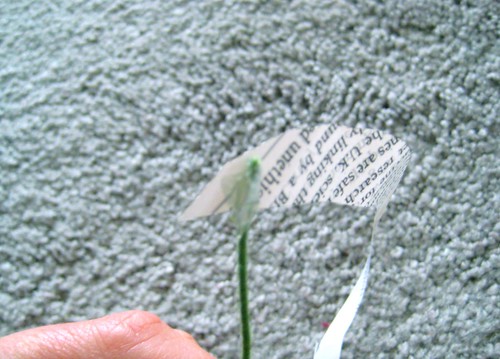
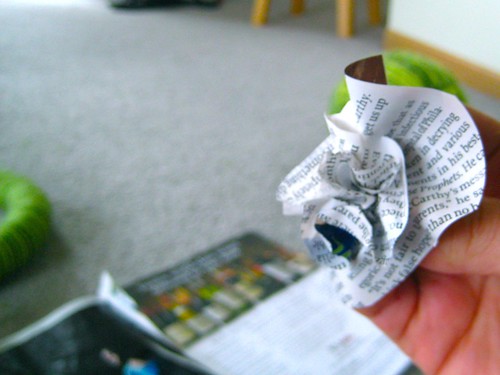
    I choose the two different floral stems because I liked the leaves and the colors. And, since it’s me, I needed to have something made out of magazines on it. I saw this tutorial from Dozi on another blog and printed it off a long time ago for creating paper flowers. I don’t remember which blog referenced the tutorial, but thank you!

    Time Magazine is good for large blocks of text, but the paper stock is rather light. The result was more of a bud than the full flower that Dozi achieved. To get the bud to work, I glued it onto floral wire and then wrapped from there. I held on to the bottom of the wrap to try to get the top to fan out.

    The buds were not enough magazine, so I simply made some paper carnations by bunching together a couple of different sized circles.

    Finally, I grabbed the hot glue gun and just started sticking stuff on. I wish I could tell you that there was a process, but I would add something and then realize it needed something else.

    My door is a now a lot more welcoming.


    Time for spring 8
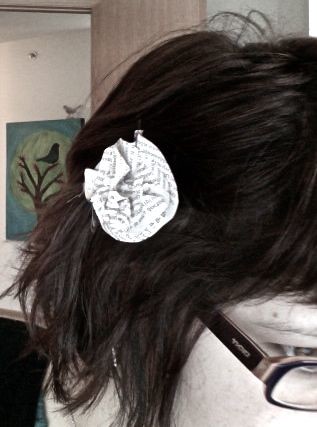
    Oh, and I had an extra paper carnation, so I glued it onto a bobby pin and stuck it in my hair.

    3/15/10

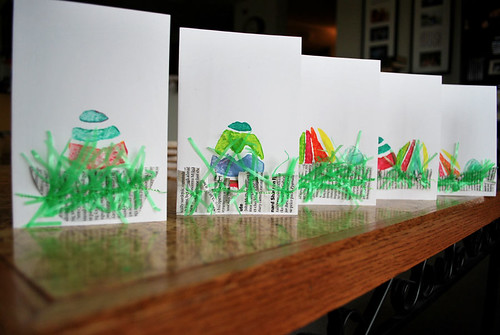
    Easter cards

    You'll see a lot of different greeting and notecards here at the Table. I've been into card making for a couple of years, maybe more than that! What started with leftover scrapbooking supplies (when that was my thing), has become a way to try new techniques. Friends and family have come to expect handmade cards on their birthdays and any holiday worth sending a card (no cards for administrative assistants day!). I combined three different techniques on these cards: potato stamps, sewing on paper, and collage. 


    eastergg11 1) Cut eggs out of potatoes. It's surprising, but I didn't cut myself! After cutting the (russet) potatoes in half, I took my paring knife and ran it about a quarter an inch from the cut edge, at about a quarter of an inch in. Then, I start to carve the egg shape. I tried to add different designs. Straight lines were easiest, polka dots didn't turn out well at all
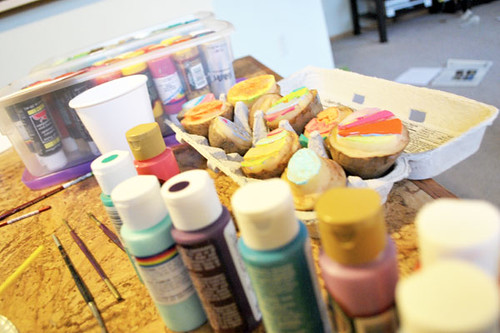
    easteregg10 2) Grab some acrylic paints in assorted spring colors and start painting the different sections of the egg. I reused the best of the 'eggs' with different color combinations. Here, remember to wipe off the paint, including the crevices or you get green when you expect yellow after a couple of stamp
    easteregg9 3) Lay out the cards and start stamping. I tried different combinations of one, two and three eggs. I also tried horizontal and vertical layouts. My favorite turned out to be two eggs with minimal overlap on a vertical card
    easteregg8 4) To keep the eggs from making a mess on my table, I used an egg carton. Yes Mom, I know I forgot to put down a drop cloth over my nice table. I promise I didn't make a mess and I won't do it again
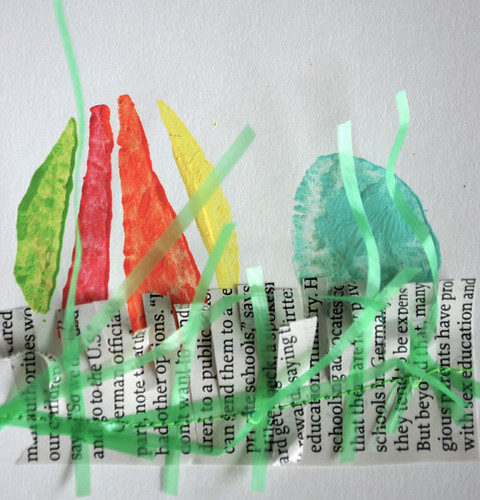
    easteregg7 5) Cut strips of text from a magazine. Time Magazine worked well because it has large blocks of text and the paper is pretty thin. Then, cut a fringe along one edge. I used a glue stick to tack down the newspaper grass
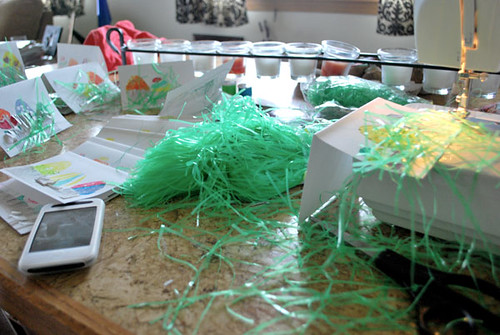
    easteregg6 6) This part was messy. Open up a bag of the green plastic grass for Easter baskets. Cut the pieces in half because you don't need the whole length
    easteregg5 7) Lay the card on the sewing machine and spread some of the grass over the other grass. Just grab a handful and lay it on top; not all of it will get caught in the stitch. I probably wouldn't recommend this method if you're a perfectionist, but it was interesting to see what stuck. If there are holes in the green grass, just grab another handful and run a second stitch
    easteregg4 8) Trim the grass. This was definitely the biggest mess. Thank goodness for my dustbuster! I tried to trim the green grass so that it didn't stick off the card or cover too much of the eggs
    9) Fan out the newspaper grass, pop in an envelope and drop it in the mail. If you want to skip all but this last step, you can get a handmade, unique potato egg card at my etsy shop


    Eastereggs1

    3/13/10

    Birthday card

    IMG_0853Doodles, pretty paper and a sewing machine. This is what I can do with those three things.

    This birthday card for my coworker was pretty fun to make. I think it might be the first time that something I've hand drawn has ended up on one of my cards without some kind of manipulation. I have done some drawings for things to gocco, but those sketches still get enlarged or grouped together on the copier. This one was fun. The question is, did she like the card?

    3/11/10

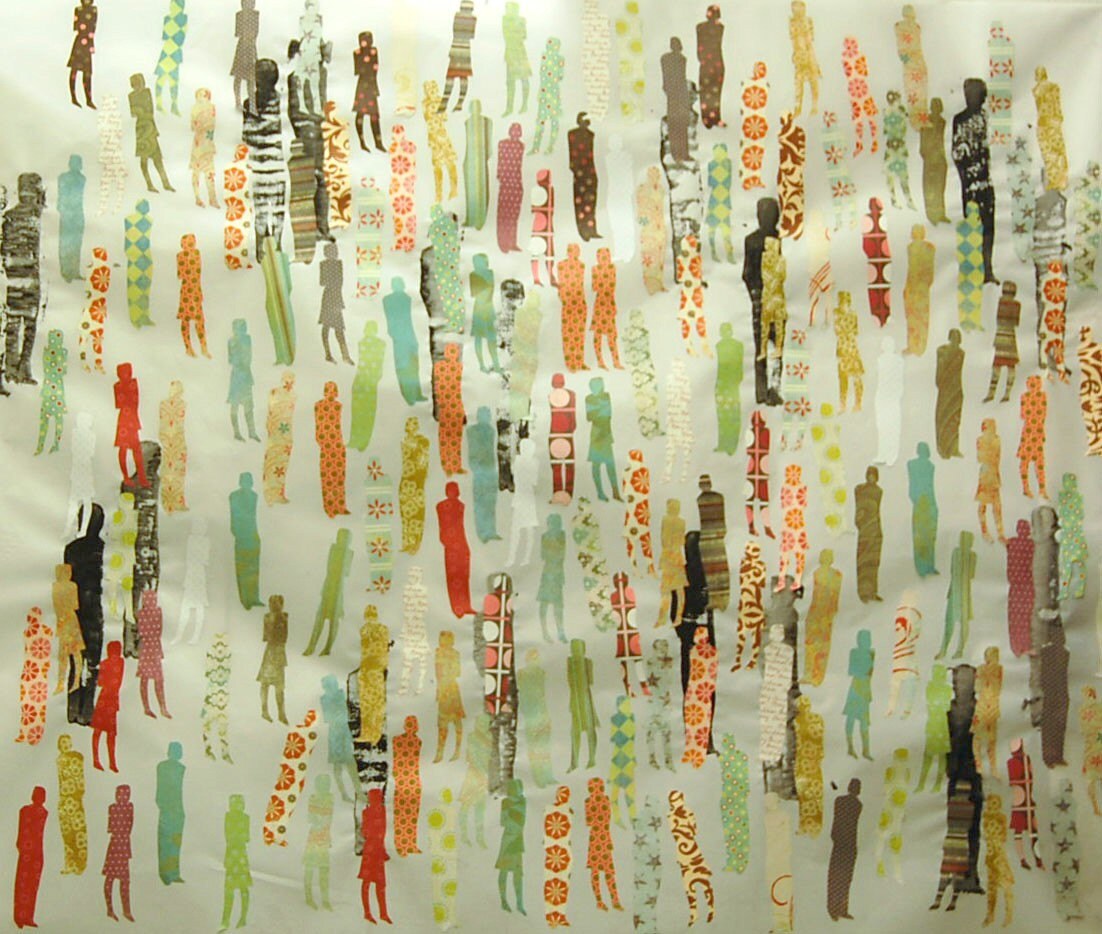
    Crowds

    There were people everywhere this weekend. Crowds can be beautiful, like this collage from etsy artist dannyliz. I love the beautiful papers, and this is a crowd I would love to sit and watch all day.

    However, crowds at the grocery store, the mall, Wal-mart, and Joann Fabrics sapped all creative energy out of me (unlike the crowd above). Too bad I saved Joann Fabrics for my last stop - I was too tired to come up with exciting projects.

    3/4/10

    Nifty Table

    Welcome to my new project! My goal is to help spark your creativity by presenting projects that I've completed (along with steps and photos), reviews of craft books, resources, and ideaboards based on what I like at the present. You'll probably also see quite a few references to Etsy, which I love.


    During the day, I am a project manager at a software company. But, before this, I had a background in journalism and dabbled in graphic design. I miss the creative outlet that my previous job provided, so this is my attempt to make up for the loss.


    Here are some of my projects:

    My interests are scattered widely through the craft world: painting, computer graphic desing, sewing photography, but especially paper crafts. I really like making cards or anything that can be done with pages ripped out of magazines. Oh, and as you can tell, I also like birds.

    My mom and sister are also quite crafty. At Home (with the big H), we do most of our crafting around the dining room table. Thus the name of the blog. I expect you'll be hearing from the two of them along the way.

    Thanks for joining me!