Showing posts with label magazine. Show all posts

4/23/10

Happy Earth Day!

So, I did celebrate Earth Day yesterday with a new DIY necklace. This was made from one of the t-shirts that I dyed a while back - it's the same color material as the puff paint t-shirt . I got the idea from an issue of Body + Soul that I read at my friend's house in the country.

tshirt necklace

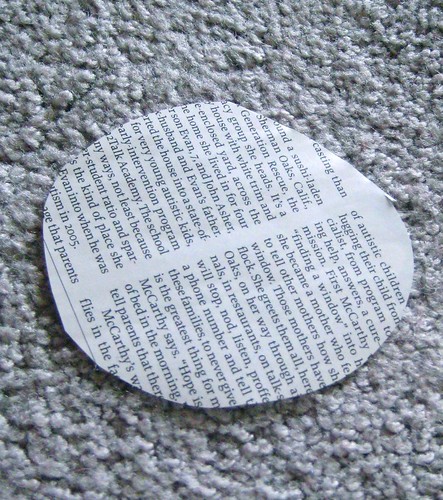
1) Lay a t-shirt out flat and cut strips. The magazine article said to use a rotary cutter, but since I don't own one of those, I tried to cut even strips by hand. It worked out pretty well.

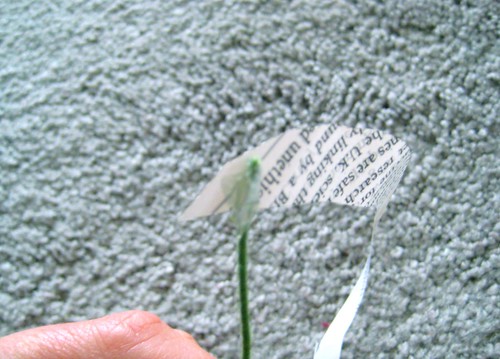
2) Stretch out the loops until they curl.

3) Double the bunch of loops, and tie the back with a scrap of the same t-shirt
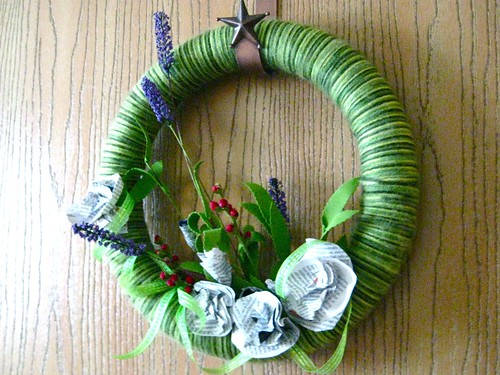
Tada!

I think this would be really pretty with charms attached at intervals to the loops.

What else did you do for Earth day? One of my friends at work biked to work. Besides new jewelry out of something that I had at home, all I did was make sure that I turned off the big monitor on my desk when I left (after a reminder from another coworker).

3/25/10

Time for spring wreath

When folks come to visit my apartment, I tell them to go until they see an orange rug. The rug came from Anthropologie many years ago, and I just put it there when I moved in. I always meant to get a new rug, but I've really come to love the spot of color when I come around the corner to my door. Then, at Christmas, I hung my very first wreath. That came down about mid-January and my door has been rather ordinary since then.
Time for spring6


Until now. I finished my new wreath, which I am calling 'Time for spring'. It's made from a Styrofoam wreath form, yarn, fake flowers and pieces of time magazine. And, a lot of hot glue.
Time for spring5 Time for spring1 Time for spring2 Time for spring3 Time for spring4 Time for spring7 
    First, I covered the wreath form with variegated green yarn. This took quite awhile. I started on Sunday during the Oscars, and worked on it a little bit each night since then. The real trick was keeping the yarn from tangling as I wound it around the form.

    I choose the two different floral stems because I liked the leaves and the colors. And, since it’s me, I needed to have something made out of magazines on it. I saw this tutorial from Dozi on another blog and printed it off a long time ago for creating paper flowers. I don’t remember which blog referenced the tutorial, but thank you!

    Time Magazine is good for large blocks of text, but the paper stock is rather light. The result was more of a bud than the full flower that Dozi achieved. To get the bud to work, I glued it onto floral wire and then wrapped from there. I held on to the bottom of the wrap to try to get the top to fan out.

    The buds were not enough magazine, so I simply made some paper carnations by bunching together a couple of different sized circles.

    Finally, I grabbed the hot glue gun and just started sticking stuff on. I wish I could tell you that there was a process, but I would add something and then realize it needed something else.

    My door is a now a lot more welcoming.


    Time for spring 8
    Oh, and I had an extra paper carnation, so I glued it onto a bobby pin and stuck it in my hair.

    3/16/10

    Heart garlands

    Instead of your traditional valentine card, I sent a bit of home decor. It was fun talking to everyone I sent one to and hearing where they hung up their garland. I'm selfish - I kept two and put one in my apartment and one in the window at my office at work.
    Hearts3


    It was a very simple process:
    1) Grab a stack of magazines from one of the many overflowing piles. The Anthropologie catalogs were definitely my favorites
    2) Pull out all the pages that had pretty designs
    3) Create heart templates out of card stock. This helped me group the hearts on to the page and make the best use of pretty patterns
    4) Start cutting. I freehanded some hearts as I got more comfortable
    5) Lay out the yardstick and start putting rows of hearts together
    6) Start up the sewing machine and run the hearts through. I found that it was easiest if I kept the hearts spaced only a couple of stitches apart. You can see in the picture above what happened when the hearts weren't propped up by their neighbors
    7) Stick in envelopes with a note for friends and family. I put aside a few to share with etsy friends, too


    Hearts2Hearts1