Showing posts with label Decor. Show all posts

3/30/10

Photo Collage

Back in December, I visited the Etsy Dallas Jingle Bash and purchased some awesome letterpress letter cards spelling out our last name.  I didn't really think about where I was going to put them, so when I got them home, I tried holding them up around our apartment.  They never seemed quite right anywhere, but ended up on the wall in the corner behind our TV. They were looking really strange to me back there and it finally got on my nerves enough that I decided to a photo collage around the letters.


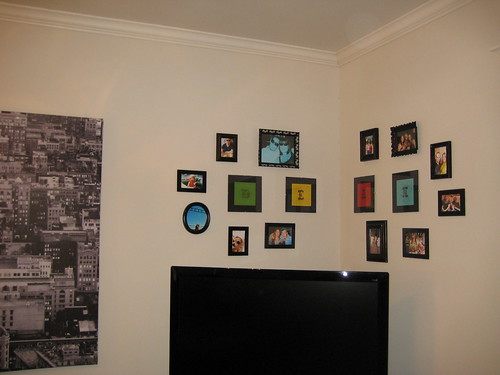
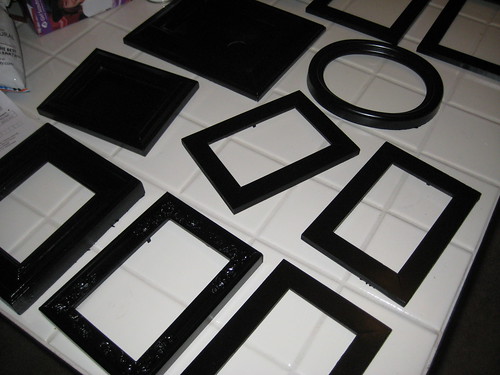
I'm all about cheapness, and thrifting at Goodwill led me to some fantastic frames for only a buck or two.


IMG_1455


After clorox-wiping all of the Goodwill frames, I started arranging the frames around the paper templates I'd made of the letters already on the wall (pardon the puppy, she got curious).


IMG_1453


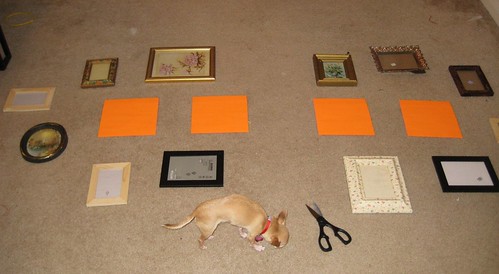
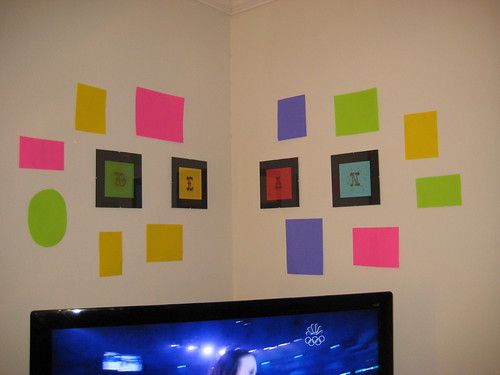
Then, I made paper templates of all the frames and hung those on the wall with the letters to make sure it looked okay from across the room.


IMG_1454


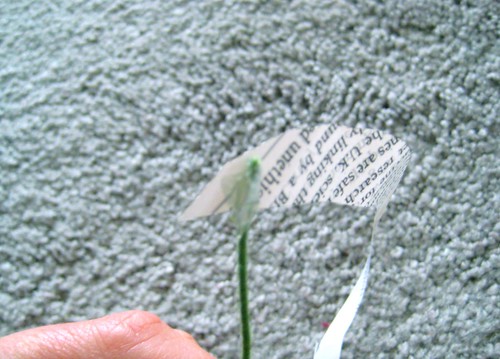
I don't have any pictures of the actual painting, but I hauled all the goodwill frames out to the top deck of the parking garage at my apartment complex (oh, how I wish I had a house with a yard) and spray painted them all black while my neighbors looked at me like I was crazy.


IMG_1473


Ta-Da!


IMG_1476

3/25/10

Time for spring wreath

When folks come to visit my apartment, I tell them to go until they see an orange rug. The rug came from Anthropologie many years ago, and I just put it there when I moved in. I always meant to get a new rug, but I've really come to love the spot of color when I come around the corner to my door. Then, at Christmas, I hung my very first wreath. That came down about mid-January and my door has been rather ordinary since then.
Time for spring6


Until now. I finished my new wreath, which I am calling 'Time for spring'. It's made from a Styrofoam wreath form, yarn, fake flowers and pieces of time magazine. And, a lot of hot glue.
Time for spring5 Time for spring1 Time for spring2 Time for spring3 Time for spring4 Time for spring7 
    First, I covered the wreath form with variegated green yarn. This took quite awhile. I started on Sunday during the Oscars, and worked on it a little bit each night since then. The real trick was keeping the yarn from tangling as I wound it around the form.

    I choose the two different floral stems because I liked the leaves and the colors. And, since it’s me, I needed to have something made out of magazines on it. I saw this tutorial from Dozi on another blog and printed it off a long time ago for creating paper flowers. I don’t remember which blog referenced the tutorial, but thank you!

    Time Magazine is good for large blocks of text, but the paper stock is rather light. The result was more of a bud than the full flower that Dozi achieved. To get the bud to work, I glued it onto floral wire and then wrapped from there. I held on to the bottom of the wrap to try to get the top to fan out.

    The buds were not enough magazine, so I simply made some paper carnations by bunching together a couple of different sized circles.

    Finally, I grabbed the hot glue gun and just started sticking stuff on. I wish I could tell you that there was a process, but I would add something and then realize it needed something else.

    My door is a now a lot more welcoming.


    Time for spring 8
    Oh, and I had an extra paper carnation, so I glued it onto a bobby pin and stuck it in my hair.

    3/14/10

    My Own Home Hack

    One of my favorite blogs to read is Apartment Therapy.  I love seeing beautiful kitchens, unique decorating styles and MOST OF ALL, I love their Home Hacks.  When I stumbed across this awesome tree made out of yarn and push pins, I decided to put my own spin on it:


    So, I ventured out to my favorite two-story JoAnn's and picked up some yarn, ran into Wal-Mart for clear pushpins, and then rushed home to start playing.  I'm not really a tree person, so I decided to try something a little more abstract and random on the bare wall behind the desk in our home office.


    IMG_1469


    Here's a closeup of the colors I chose.  I was thinking of going with grey and yellow, but when I saw this pretty bright apple green, I was sold. 

    IMG_1472
    This project is great for apartment dwellers like me who can't paint walls and are scared of putting big holes in the walls.  The holes left by pushpins are small and the artwork has a huge impact.