Showing posts with label cards. Show all posts

12/21/10

More Christmas cards

 
Megs asked me to put together their Christmas card again this year. Megs' man likes to send cards with pictures. This posed a problem. That would've been an expensive photo session if I'd've come down from WI. She thought about asking family when everyone (but me) was home for Thanksgiving, but that didn't happen.

So, they went and took pictures of each other. That's right, It looks like Megs and her man are standing next to each other. But, this was two separate photos. Megs did a great job of selecting a place that made it easy for me to blend the photos. By selecting a neutral background, I could easily overlay the pictures and blend away the differences. It looks even more like they are standing next to each other because of the line in the sidewalk that Megs is standing on.

Megs sent me these pictures late one Sunday. I told her that I wouldn't be able to get to the card before the following weekend because I would be traveling for work. But, I sat down to look at the pictures and to see what could be done. As I said, it was easy to combine the picture. Then, I started adding the additional holiday elements and sent it to Megs for her to tell me what she wanted me to do differently. This was the first time I think I've ever designed something for her that didn't need at least a little tweaking. Which made a liar out of me, since I said I couldn't finish until the next weekend.

I'm happy that Megs and her man liked the card, and I hope that everyone who got their's in the mail felt a little more holiday cheer for it.

12/19/10

Christmas Cards

Tannenbaum

Last year for Christmas, BLady and Megs gave me the Epic Six Letterpress. It took a bit to get it back to WI, but it was here in time to do my Christmas cards. You'll see in the Ornament Swap post that Christmas Trees were my theme this year.

Thank you, to Boxcar Press for this review of the tool and tips on using it. There were a few other reviews and tip sheets that I reviewed before getting ink all over my fingers, so thanks to everyone who has shared information.

I got the Speedball Brayer from Hobby Lobby instead of attempting to use the supplied one, which did look dinky. As you can tell from the picture, though, I didn't follow all of the tips. I used the foam guides, but I took my scissors and snipped them in half after they were placed. 

The one thing that did take some time to learn was how to get the correct amount of ink. That E in the picture came from one of my first cards, when I had way,way,way too much ink. It took almost a week for some of those cards to dry! But, I got better and the last cards were pretty good.

I used a couple of sets of the Everyday letterpress letters. The design that incorporated two different styles of letters came about because, well, Tannenbaum has THREE Ns! Each set only came with one of each letter. So, instead of ending up with three sets of the same letters, I decided to invest in a script set. But, I am pleased with the design overall. 

The one lesson I learned the hard way was this - make sure you have the proper cleaners before you begin. I had to drive to Ace Hardware in a snowstorm to get mineral spirits to clean off everything.

Oh, in case you're wondering - the cards came from Paper Source as did the spruce envelopes. And, USPS also obliged by having evergreen stamps this year.

3/15/10

Easter cards

You'll see a lot of different greeting and notecards here at the Table. I've been into card making for a couple of years, maybe more than that! What started with leftover scrapbooking supplies (when that was my thing), has become a way to try new techniques. Friends and family have come to expect handmade cards on their birthdays and any holiday worth sending a card (no cards for administrative assistants day!). I combined three different techniques on these cards: potato stamps, sewing on paper, and collage. 


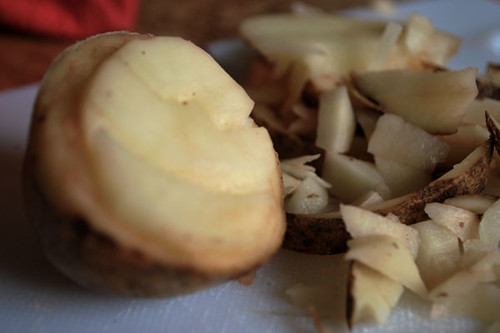
eastergg11 1) Cut eggs out of potatoes. It's surprising, but I didn't cut myself! After cutting the (russet) potatoes in half, I took my paring knife and ran it about a quarter an inch from the cut edge, at about a quarter of an inch in. Then, I start to carve the egg shape. I tried to add different designs. Straight lines were easiest, polka dots didn't turn out well at all
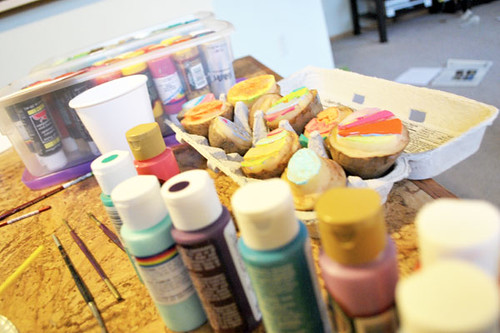
easteregg10 2) Grab some acrylic paints in assorted spring colors and start painting the different sections of the egg. I reused the best of the 'eggs' with different color combinations. Here, remember to wipe off the paint, including the crevices or you get green when you expect yellow after a couple of stamp
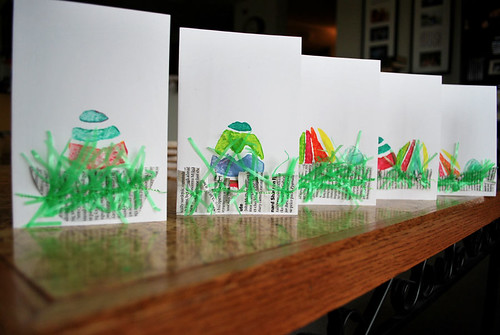
easteregg9 3) Lay out the cards and start stamping. I tried different combinations of one, two and three eggs. I also tried horizontal and vertical layouts. My favorite turned out to be two eggs with minimal overlap on a vertical card
easteregg8 4) To keep the eggs from making a mess on my table, I used an egg carton. Yes Mom, I know I forgot to put down a drop cloth over my nice table. I promise I didn't make a mess and I won't do it again
easteregg7 5) Cut strips of text from a magazine. Time Magazine worked well because it has large blocks of text and the paper is pretty thin. Then, cut a fringe along one edge. I used a glue stick to tack down the newspaper grass
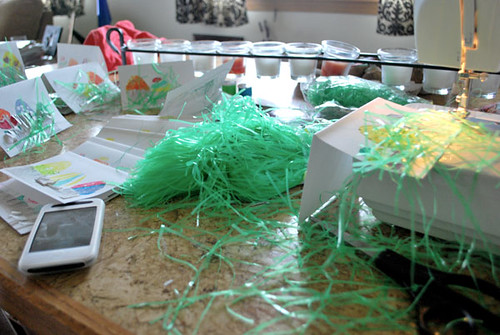
easteregg6 6) This part was messy. Open up a bag of the green plastic grass for Easter baskets. Cut the pieces in half because you don't need the whole length
easteregg5 7) Lay the card on the sewing machine and spread some of the grass over the other grass. Just grab a handful and lay it on top; not all of it will get caught in the stitch. I probably wouldn't recommend this method if you're a perfectionist, but it was interesting to see what stuck. If there are holes in the green grass, just grab another handful and run a second stitch
easteregg4 8) Trim the grass. This was definitely the biggest mess. Thank goodness for my dustbuster! I tried to trim the green grass so that it didn't stick off the card or cover too much of the eggs
9) Fan out the newspaper grass, pop in an envelope and drop it in the mail. If you want to skip all but this last step, you can get a handmade, unique potato egg card at my etsy shop


Eastereggs1